Mastering GitHub: Step-by-Step Tutorial for Uploading Code via Linux Command Line.
Working with code can quickly become very difficult, especially when it comes to big scale projects. Not only does the modules themselves take up storage space on the system but it is also very difficult to share them amongst team members and the masses. This task is made significantly easier by using Git and GitHub.
What is GitHub?
GitHub is an online platform and cloud based service owned by Microsoft used mainly for software development and code sharing, over the years it has gained more and more popularity amongst developers and enthusiast alike.
What is Git?
Git is a distributed version control system that track changes in any set of computer file.
Now, that sounds very interesting, but how do you make commits and upload your code on the platform?
In this step-by-step guide, i will show you how to upload your project files and code via the Linux terminal to GitHub using Git.
Firstly, After launching Linux, head to your root terminal and install Git by using the command "sudo apt install git".


Using the command git status we can see that there is no commit yet but there is in-fact a file present in the directory.

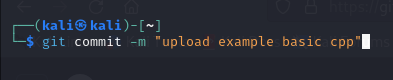
Fourthly, we need to add the file that we want to commit. Using the command git add <filename>.


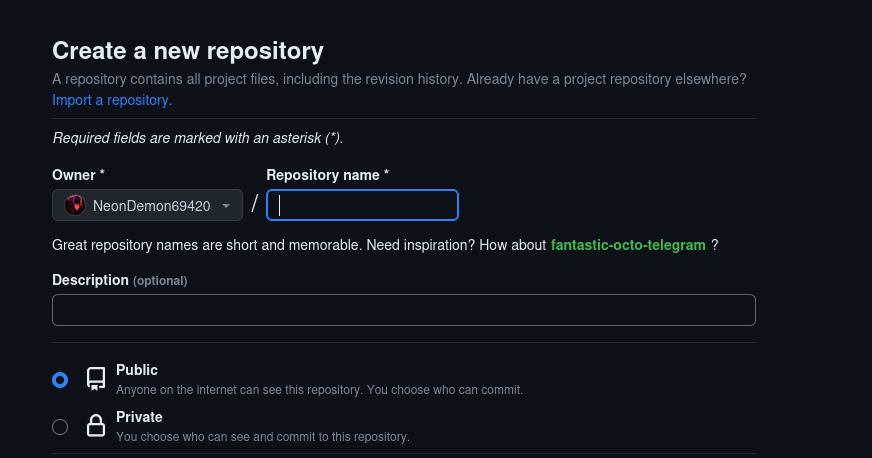
Give the repository a meaningful name and click the create repository button


If you try using git push -u origin master you will not be able to upload your code as password authentication is no longer supported.


Choose an option and click generate.

Click all the boxes and click the button named generate token.

Copy your token and paste it in a safe place as you only get access to i only once.


Refresh your GitHub page and your project should be there.

Comments
Post a Comment